Move WordPress Uploads to Amazon S3 with the Uploads to S3 Plugin
A growing WordPress Media Library can consume a considerable amount of server storage. Product photos, image thumbnails, documents, and other static files also add work to the web server on busy sites. The Uploads to S3 WordPress plugin moves selected WordPress storage paths to Amazon S3 and rewrites their public URLs so browsers load those files from S3 or a configured CDN.
This guide covers a safe setup: connect the plugin to AWS, choose the correct bucket and public URL, separate environments with domain prefixes, test a small sync, and verify the result before deleting local files.
Moving uploads does not move WordPress itself, its database, or its PHP workload to S3. It can reduce local disk usage and static-file traffic, but it also introduces AWS storage and transfer charges and makes the S3 configuration part of the site's production infrastructure.
Before You Begin
Prepare the following before changing the plugin settings:
- An S3 bucket in the AWS Region you intend to use.
- A dedicated IAM identity with only the permissions the plugin needs.
- An S3 Access Key ID and Secret Access Key for that identity.
- A current backup of
https://jppinto.s3.amazonaws.com/prod/uploadsand any other path you plan to sync. - A small test folder or a limited group of files for the first migration.
- An optional CloudFront distribution or custom CDN hostname, already configured and tested, if you do not want to use direct S3 URLs.
Do not use AWS root-user access keys. Follow the AWS IAM security best practices, grant least privilege, and keep credentials out of source control, support tickets, screenshots, and article drafts. If a key is exposed, deactivate it and replace it immediately.
Depending on the options you enable, the plugin may need S3 permissions such as PutObject, GetObject, HeadObject, CopyObject, DeleteObject, ListBucket, and PutBucketCORS. Limit permissions to the intended bucket and operations instead of assigning broad administrator access.
1. Enter the AWS Credentials
Install and activate Uploads to S3, then open Settings > Uploads to S3 in WordPress. On the Setup tab, enter the dedicated IAM Access Key ID and Secret Access Key, then save the settings.
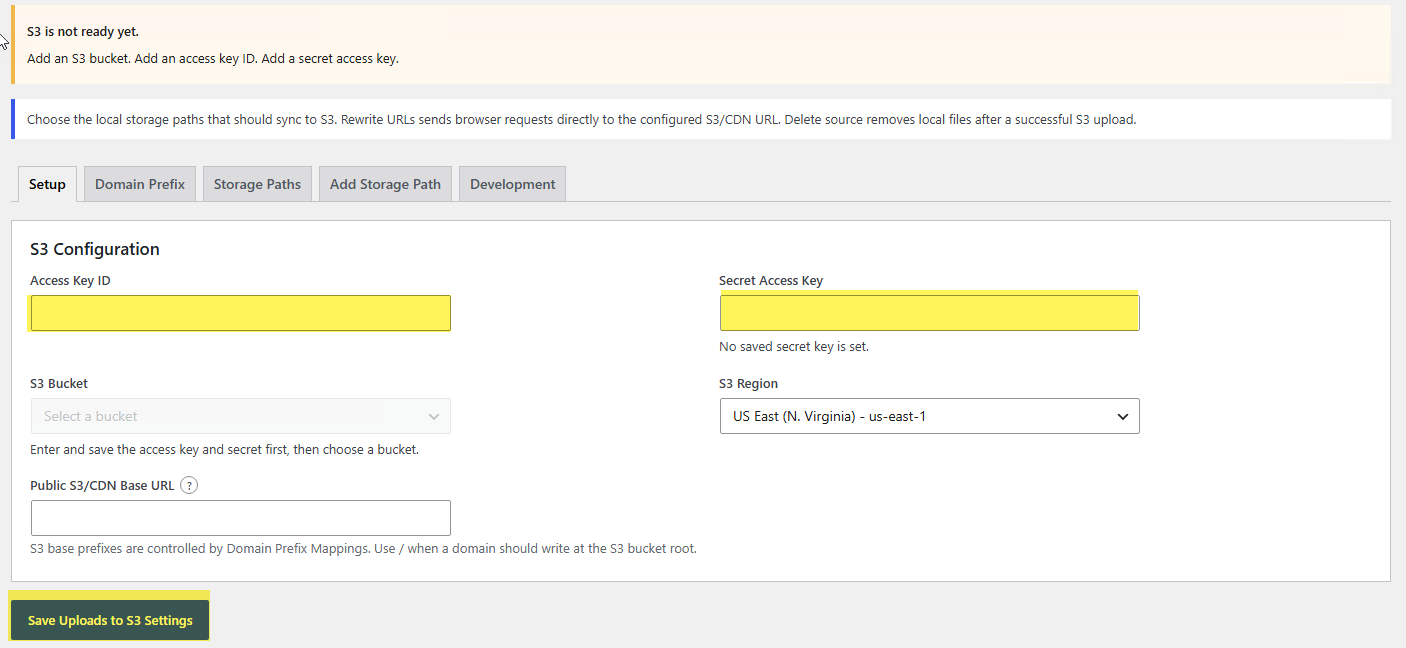
The plugin stores the secret rather than displaying it again. A saved configuration should indicate that a secret is set without revealing the secret itself.
2. Select the Bucket, Region, and Public URL
Choose the S3 bucket and its AWS Region. These two values determine where the plugin stores objects.
The optional Public S3/CDN Base URL has a different job: it controls the URL written into pages and returned to browsers. It does not change the upload destination.
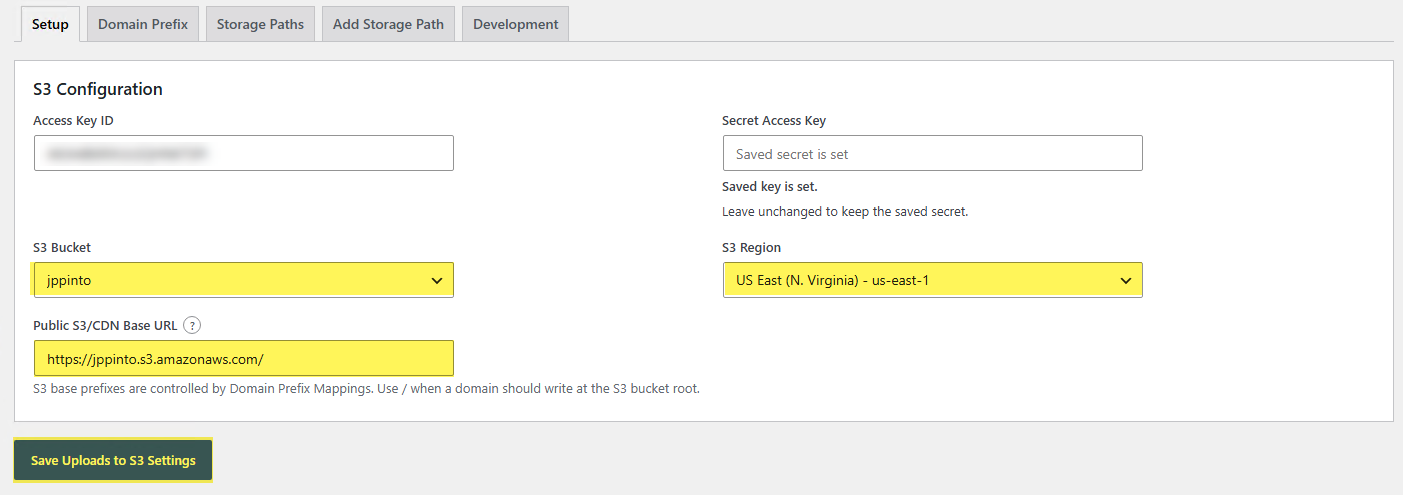
Use the configuration that matches how visitors will access the files:
| Delivery method | Bucket | Region | Public S3/CDN Base URL | Resulting base URL |
|---|---|---|---|---|
| Direct S3 in US East (N. Virginia) | example-assets |
us-east-1 |
Leave blank | https://example-assets.s3.amazonaws.com |
| Direct S3 in another Region | example-assets |
us-west-2 |
Leave blank | https://example-assets.s3.us-west-2.amazonaws.com |
| CloudFront | example-assets |
Bucket's Region | https://d123abc456def.cloudfront.net |
The CloudFront hostname |
| Custom CDN hostname | example-assets |
Bucket's Region | https://cdn.example.com |
The custom CDN hostname |
For direct S3 delivery, leave the public base URL blank and let the plugin derive the correct endpoint from the bucket and Region. If you use CloudFront, create and validate the distribution first. Uploads to S3 uses the hostname you provide; it does not create or manage the distribution. AWS currently recommends securing S3 origins with CloudFront Origin Access Control.
Do not add path segments such as /dev, /prod, or /uploads to the public base URL unless the CDN itself is intentionally configured with that path. The plugin appends the domain prefix and storage path separately.
3. Map Each Domain to an S3 Prefix
Domain Prefix Mappings let multiple WordPress environments use one bucket without writing into the same object paths. For example, map a development domain to dev and the production domain to prod:
| WordPress domain | S3 prefix | Upload path example |
|---|---|---|
dev.example.com |
dev |
dev/uploads/ |
example.com |
prod |
prod/uploads/ |
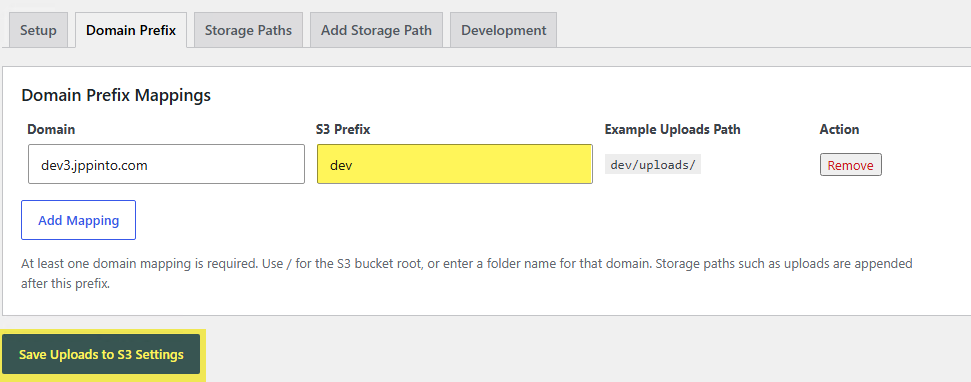
Use / as the prefix only when that domain should write directly to the bucket root. Explicit development and production prefixes are safer when environments share a bucket because they prevent filename collisions and make ownership obvious.
4. Configure the Storage Path
The Storage Paths section controls which local directories are synced and how WordPress uses their S3 copies. The standard Media Library path is https://jppinto.s3.amazonaws.com/prod/uploads.
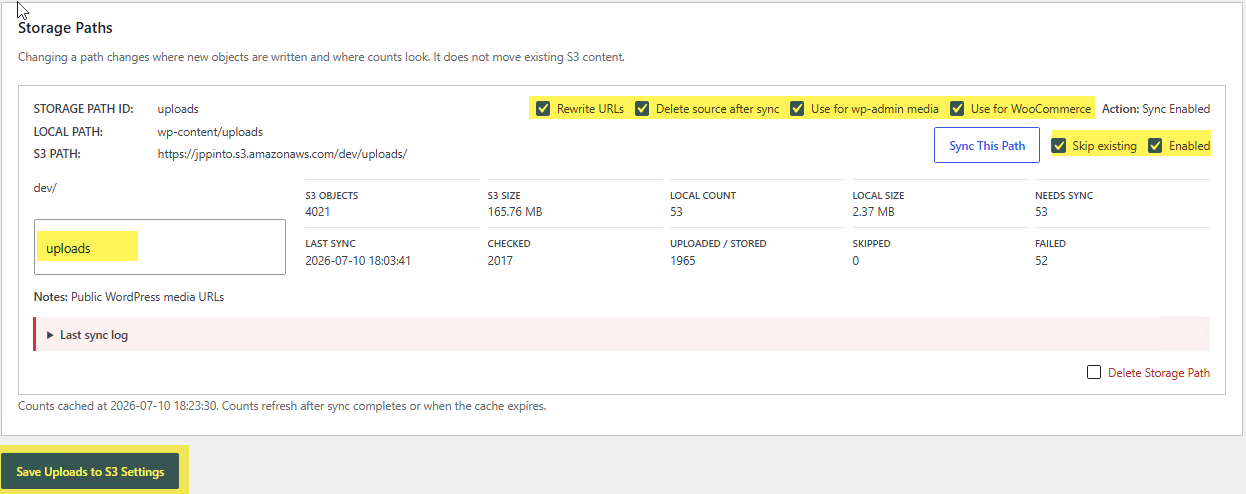
Review every path option before enabling it:
- Rewrite URLs replaces local public file URLs with the S3 or CDN URL.
- Delete source after sync removes the local file only after the plugin has stored or verified its S3 object. Keep this disabled for the first test.
- Use for wp-admin media applies the S3 URL to Media Library and other administrative media views.
- Use for WooCommerce applies the S3 path to WooCommerce media workflows.
- Skip existing checks for an existing S3 object and avoids uploading it again. Keep this enabled when resuming or rerunning a migration.
- Enabled makes the path part of the plugin's active processing, including its scheduled workflow.
Back up the local path before the first sync even if source deletion is disabled. A migration changes where WordPress expects to find media, so both the database content and the object-storage layout should be recoverable.
5. Run a Controlled Test Sync
Save the configuration, start with a small path or limited dataset, and click Sync This Path. Keep Skip existing selected. Leave Delete source after sync off until you have inspected the uploaded objects and tested the pages that use them.
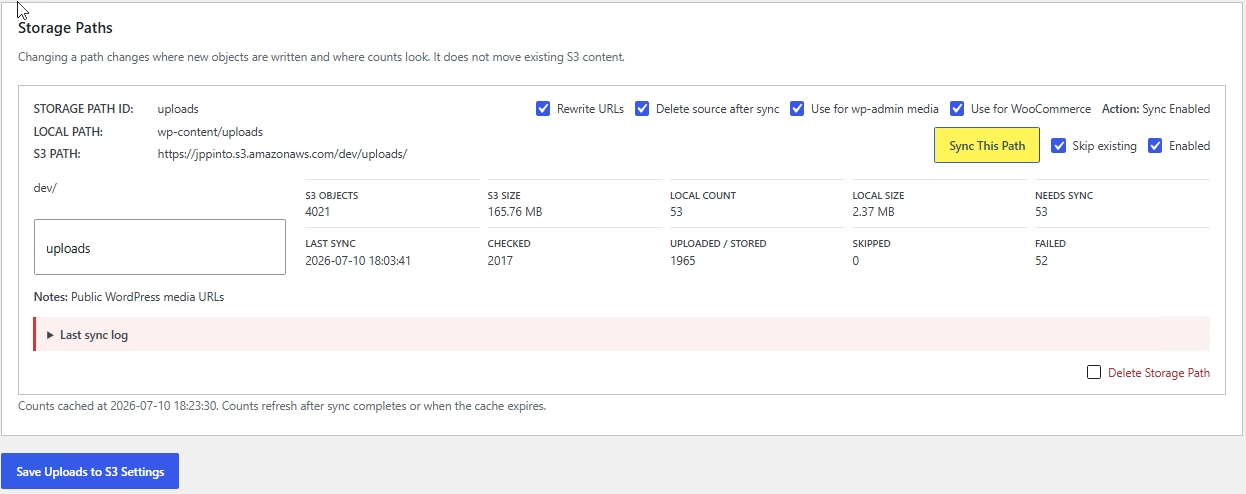
This cautious first pass separates upload and URL-rewrite testing from local-file deletion. Once the test is successful, you can expand the migration in manageable batches.
6. Monitor the Sync and Investigate Failures
The progress window reports uploaded, skipped, deleted, and failed items. A nonzero failure count is a signal to inspect the details, not a reason to enable more aggressive options.
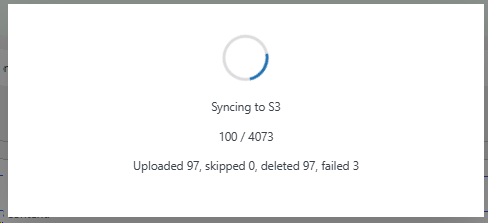
Review the last sync log and check for:
- Missing or overly restrictive IAM permissions.
- An incorrect bucket name or Region.
- Network, DNS, or TLS failures between WordPress and AWS.
- Missing local source files.
- Objects that WordPress cannot verify in S3.
- CORS errors when a browser operation requires cross-origin access.
Correct the cause and rerun the path with Skip existing enabled. Successfully uploaded objects can be verified and skipped, allowing the sync to continue without needlessly replacing everything.
7. Verify That WordPress Is Serving Files from S3
Do not consider the migration complete just because the progress counter reaches the end. Open representative pages in a private browser window and inspect their image requests with the browser's developer tools.
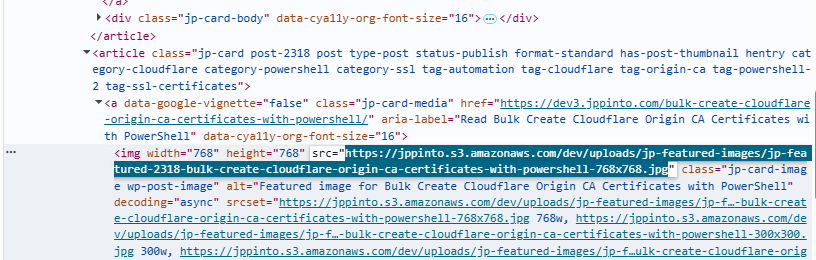
Verify all of the following:
- The expected object exists in the correct bucket and prefix.
- Image
srcandsrcsetURLs use the intended S3 or CDN hostname. - Requests return HTTP 200 with the expected content type.
- Original images and WordPress-generated thumbnail sizes load correctly.
- Media Library previews work if Use for wp-admin media is enabled.
- Product pages and galleries work if Use for WooCommerce is enabled.
- Mobile and desktop layouts display responsive image sizes without broken files.
After this validation, enable Delete source after sync only if reclaiming local storage is part of the plan and your backup and recovery process has been tested.
What Happens to New Uploads?
Once the uploads path is enabled, the plugin handles new Media Library files through the configured S3 workflow and continues processing enabled paths on its schedule. WordPress image metadata can reference the S3 or CDN URLs, including generated image sizes.
Periodically verify that new attachments reach S3 and that the site's pages still resolve them correctly. Monitoring matters especially when local deletion is enabled because an unnoticed credential, permission, or network failure could otherwise leave a new file unavailable.
Final Checklist
- The S3 bucket and Region are correct.
- A dedicated, least-privilege IAM identity is in use.
- No AWS credentials appear in code, logs, screenshots, or public content.
- Development and production domains use separate prefixes when sharing a bucket.
- The public base URL is blank for direct S3 or points to a working CDN hostname.
- A local backup exists before URL rewriting or source deletion begins.
- A small test sync completes before the full uploads directory is migrated.
- Failures are investigated and resolved rather than ignored.
- Frontend, Media Library, WooCommerce,
src, andsrcsetURLs are verified. - Local source deletion is enabled only after S3 copies and recovery procedures are confirmed.
The safest migration is incremental: configure the destination, test a limited path, verify the browser URLs, and only then expand the sync or remove local copies. That approach provides the storage benefits of S3 without making the first run an all-or-nothing change.