Externalizing SharePoint Content with StoragePoint
A big frustration with SharePoint is the way SharePoint stores content, it stores everything in SQL BLOBs (Binary Large OBjects). I have a site collection for an Accounting Department which has grown to over 200GB. In this article I will use StoragePoint, a product made by BlueThread (http://www.storagepoint.com), to externalize my content to a file share.
In the Accounting site I have 30K+ documents all files are around 7MB is size.
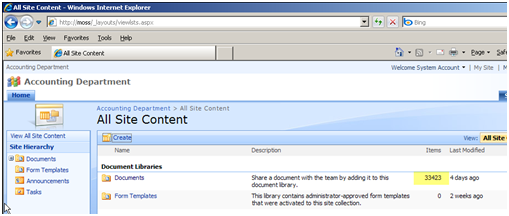
The site’s content database has grown to over 210GB:

Externalizing SharePoint Data
I have installed and configured StoragePoint, which is outlined in another article entitled ""StoragePoint Installation and Configuration"".
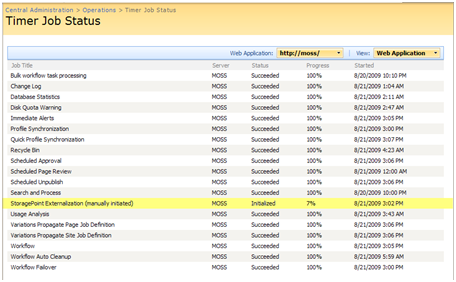
After the product is installed and configured you run a timer job on the externalization profile, you can see the process from the Timer Job Status window in Central Administrator. You will receive an email after the timer job has complete, it will contain a summary of what was externalized. The next step is to shrink the DB to remove the dead space left by the removed content. This is a pretty simple process.
Shrinking the Content DB
After the content is externalized and removed from the database, the database will have unallocated space that you should reclaim. This is a very simple process.
1) First perform a backup of your database
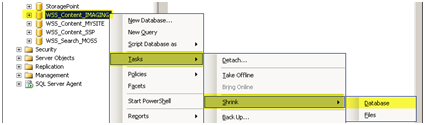
2) SQL 2005: Shrink the database by right clicking on the database > Select Tasks > Select Shrink >Select Database
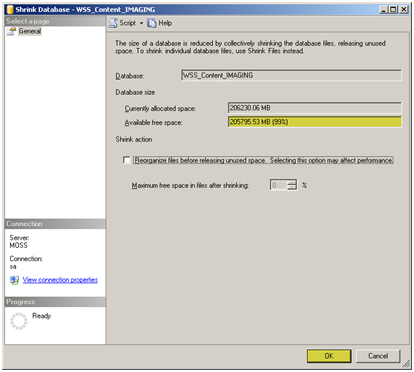
3) You can see that there is 99% of "Available free space" in the Database. Press OK to shrink the Database.
You will need to repeat this process a couple of times. Keep repeating the shrinking process until there is under 10% "Available free space"
Observations and Testing
Database Size:
The content database shrank a considerable amount. The original size of the site’s content database was 210GB and now the size of the content database is 156MB. What is really great is that the storage space the externalization took on the file share was only 38GB compressed and encrypted.
|
Before Externalization: |
|
|
After Externalization: |
|


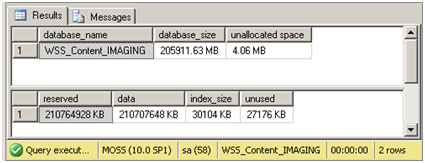
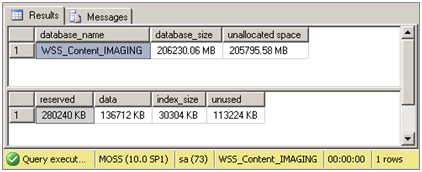
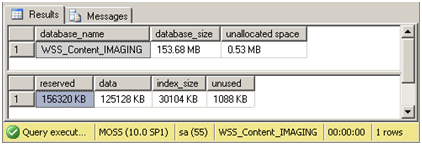
SP_SPACEDUSED is a stored procedure used to determine the space used in a database, here you can see the different stages of the externalization process and how it affects the database size.
This is the state of the database before the externalization job was started. The database size is 205G and there is 4.06MB free.
This is the state of the database after the externalization job was finished; you can see that the unallocated space had increased. The database size is 206GB and there is 205GB free.
After shrinking the database a couple of times we see the new size is 153.68 MB. That’s a huge improvement from the 210GB database
Externalized content:
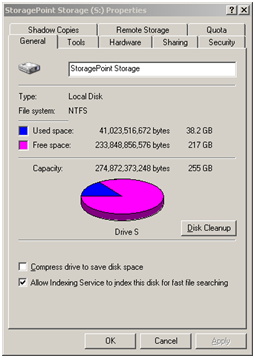
The 210GB of data that was externalized was compressed and encrypted. The total size on the file share was a very impressive 38.2GB. I was quite please with all the free space I had left over because I sized the share at 300GB.
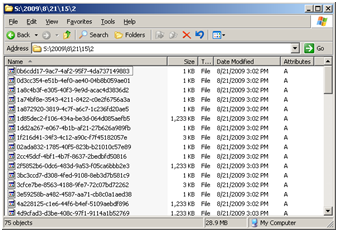
The files are stored in the share with GUID. The 7MB files were compressed down to 1.2MB. The compression was very good and I was shocked to see it even compressed TIFF’s considerable.
Document Retrieval Time:
|
Before: |
7 Seconds – I opened a 7mb file it took 7 seconds, SQL and MOSS are installed on the same server |
|
After: |
6 Seconds – The externalized file took 6 seconds to open and the document was located on a file share on a different server on the same subnet and switch. |