SharePoint 2010: Create Web Application
I am logged on to LAB-INDX as PINTOLAKE\Service-SharePoint. LAB-INDX is one of the servers where Central Administration is located, to avoid double hops. I will configure the farm directly on the server which hosts Central Administration
Open “SharePoint 2010 Central Administration” from the “Microsoft SharePoint 2010 Products” under All Programs
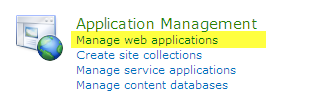
Under “Application Management” select “Manage web applications”
Delete Default Web Application
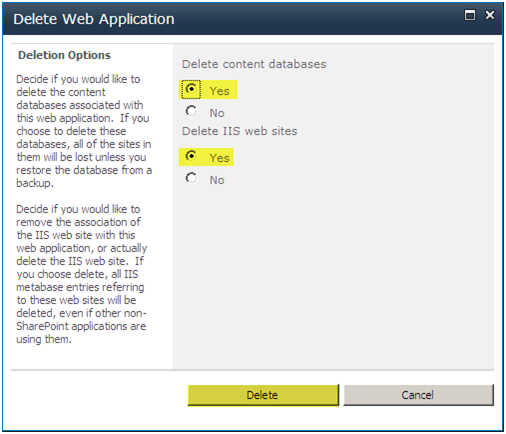
The first thing we are going to do is delete the “SharePoint -80” site, that’s the default web application. We will be making our own.
Select “SharePoint – 80”
Select “Delete” from the ribbon menu on top

Select “Delete content databases”
Select “Delete IIS web sites”
Press “Delete”
Create New Web Application
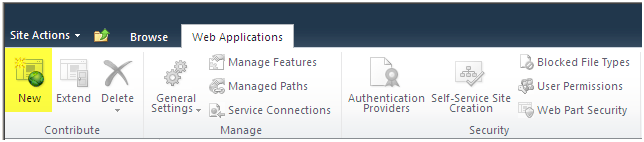
Select “New” from the top ribbon menu
When creating Web Application I like to use a naming standard my colleague Jeff Borghoff (http://www.borghoff.com) created. WSS_SITEFUNCTION you will see it’s quite useful as I describe it below. We will set the NAME of the site, the VIRTUAL DIRECTORY, the APPLICATION POOL and the DB to all use the same WSS_SITEFUNCTION name.
-
Authentication
- Select Classic Mode Authentication – this means it will use Kerberos or NTLM, if you select Claims it will use Forms based authentication
-
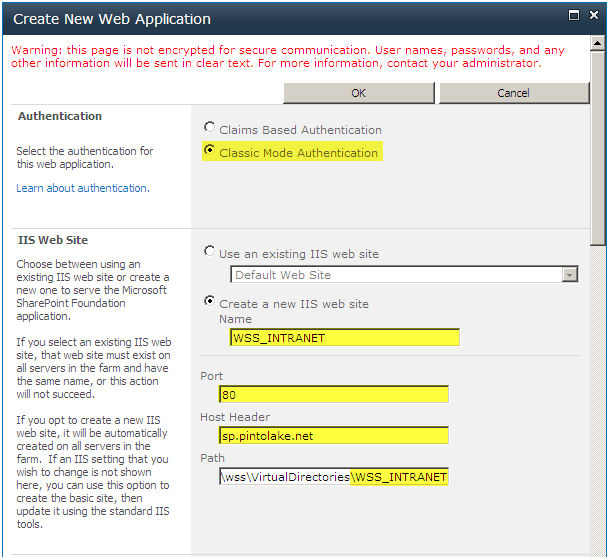
IIS Web Site
- Name – WSS_INTRANET
- Port – 80
- Host Header – sp.pintolake.net
- Path – append WSS_INTRANET after VirtualDirectories\ (remove the default)
-
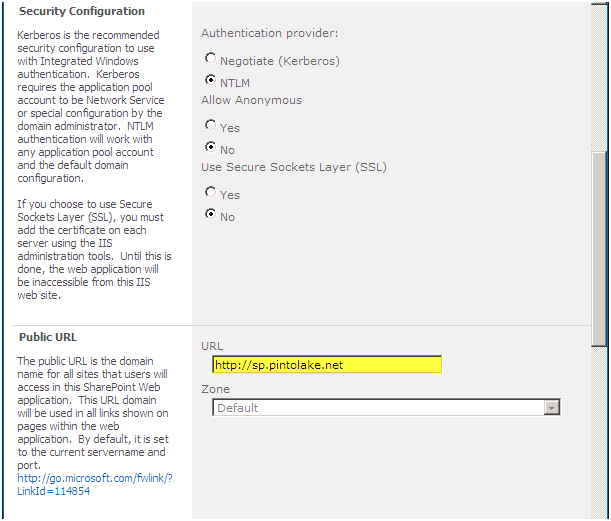
Security Configuration
- We will leave the defaults – NTLM, no Anonymous access, no SSL.
-
Public URL
- Removed the :80 from the host header URL, I know I don’t need to but it frightens me (really it does)
-
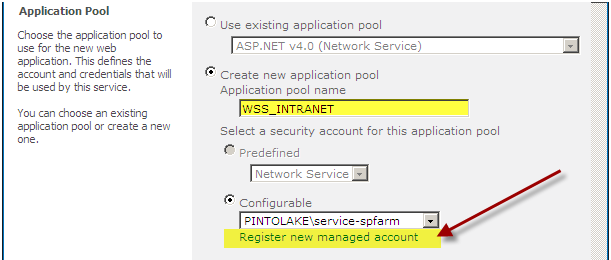
Application Pool
- Name – WSS_INTRANET
- Set it to use the PINOTLAKE\Service-WebApp account – we need to select the “Register New Managed Account” link
-
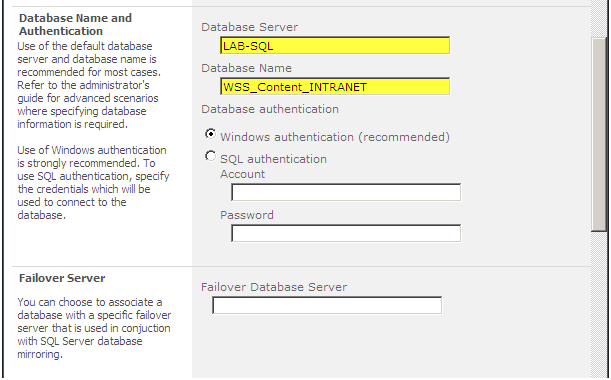
Database
- Server – LAB-SQL
- Name – WSS_Content_INTRANET (this is not following the naming standard however if I have a separate crawl DB, I can name it WSS_Crawl_INTRANET)
-
Failover Server
- This is for SQL Server Database mirroring, we are not using this so it will stay blank
-
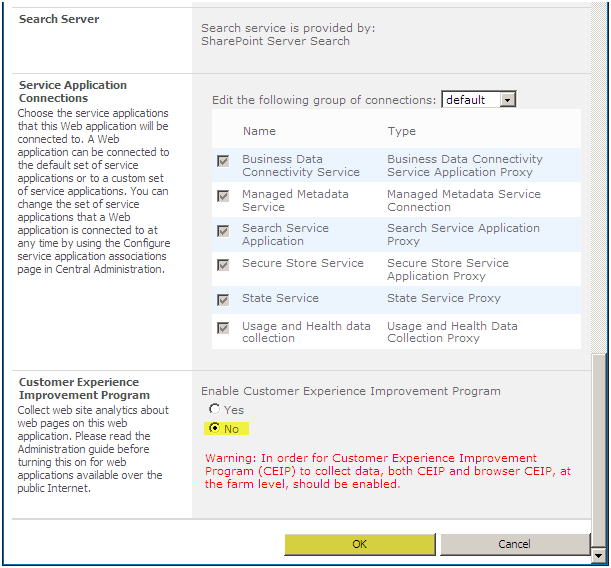
Service Application Connections
- We will leave the defaults. This is one place where you can associate a Web Application to a Service Application
-
Customer Experience Program
- Select No
Press “OK”
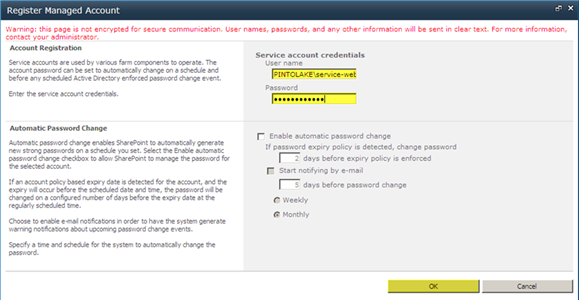
A dialog box will pop up, enter the PINTOLAKE\Service-WebApp account and password.
Be sure to select the account after it is created.

Continue on with the configuration.
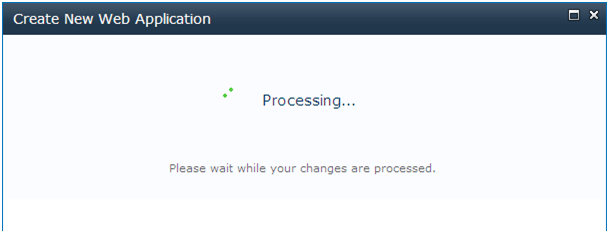
SharePoint will now process your request
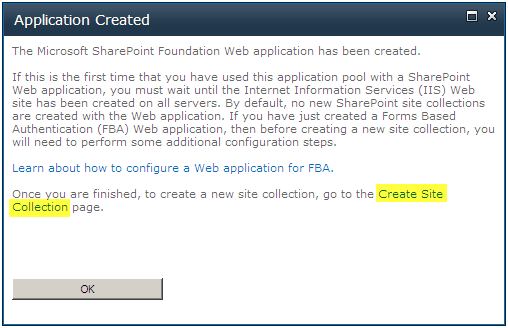
Once the Web Application is create you need to create a site collection
Click “Create Site Collection”
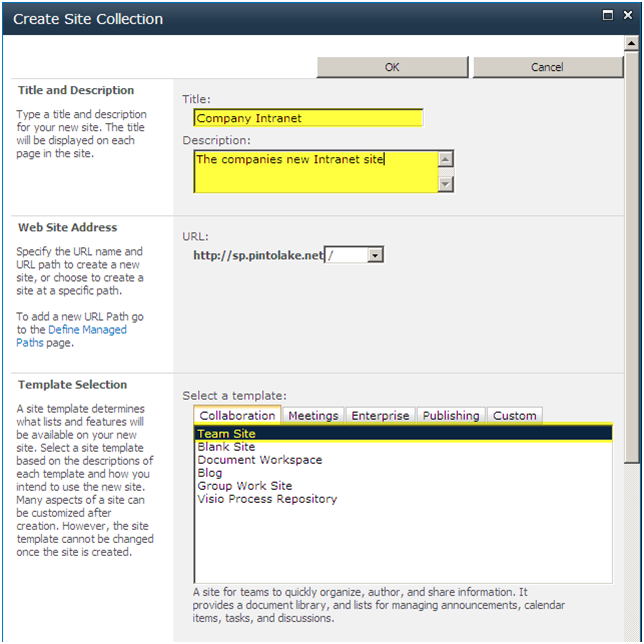
Enter “Title” and Description”
Select “Site Template”
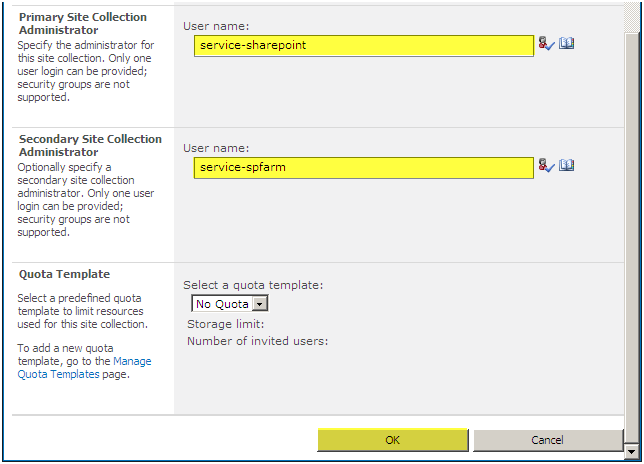
Select “Primary Site Collection Administrator”
Select “Secondary Site Collection Administrator”
Click “OK”
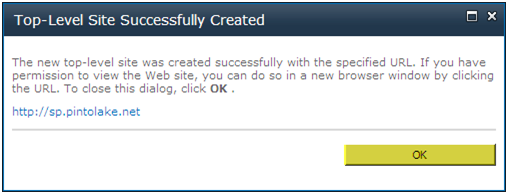
Press “OK”
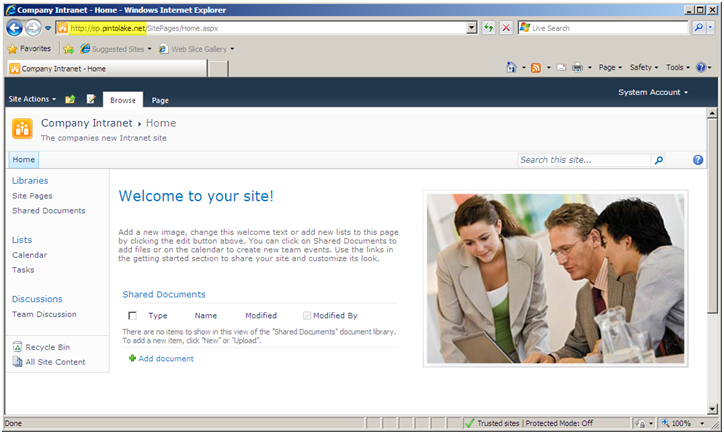
Testing
You should be able to navigate to the site collection which in my case is http://sp.pintolake.net