0 1 0 1 0 1 0 1 0 1 0 1 0 1 0 1 0 1 0 1 0 1 0 1 0 1 0 1 0 1 0 1 0 1 0 1 0 1 0 1 0 1 0 1 0 1 0 1 0 1 0 1 0 1 0 1 0 1 0 1 0 1 0 1 0 1 0 1 0 1 0 1 0 1 0 1 0 1 0 1 0 1 0 1 0 1 0 1 0 1 0 1 0 1 0 1 0 1 0 1 0 1 0 1 0 1 0 1 0 1 0 1 0 1 0 1 0 1 0 1 0 1 0 1 0 1 0 1 0 1 0 1 0 1 0 1 0 1 0 1
JPPINTO
  • Home
  • Blog
  • Certifications
  • About
  • Contact
  • Shop
  • Gallery
  • Current Setup
Contact

Search

September 11, 2013 / IIS 8.0, Windows 2012

Installing the Web Server Role (IIS) on Windows Server 2012
Tags: iis install 2012, iis server 2012 install, install iis server 2012, installation iis on 2012, server 2012 iis installation
Featured image for Installing the Web Server Role (IIS) on Windows Server 2012

“

Launch Server Manager
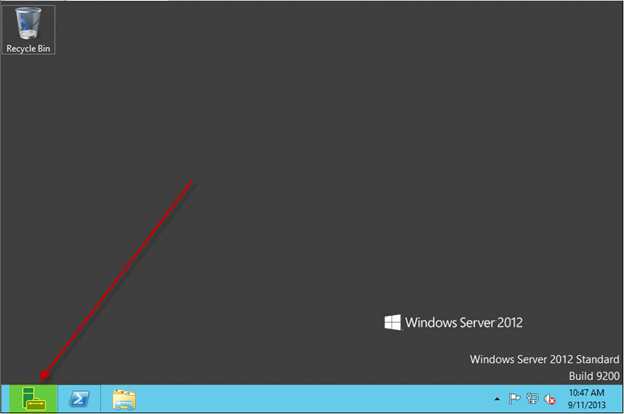
Server Manager shortcut on the Windows Server 2012 taskbar.

“

Click on Manage then select Add Roles and Features
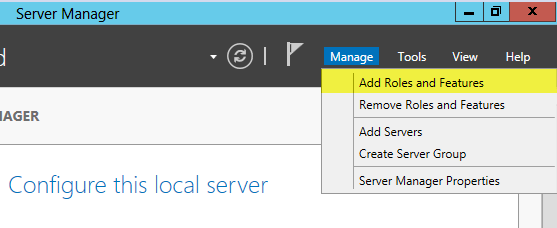
Add Roles and Features command in the Server Manager Manage menu.

“

Click Next on the Before you Begin screen
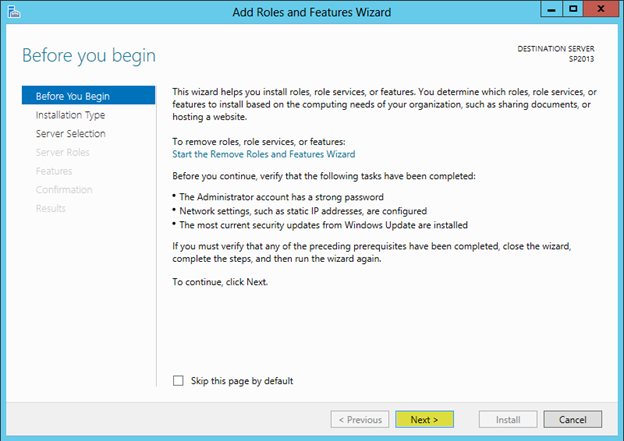
Before You Begin screen in Add Roles and Features.

“

On the Installation Type screen select Role-based or feature-based installation then press Next
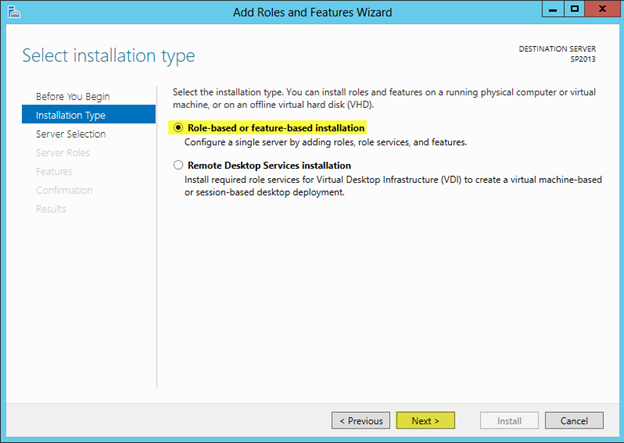
Role-based or feature-based installation selected.

“

On the Server Selection screen select the server in this case we are installing on the local server which is SP2013, press Next
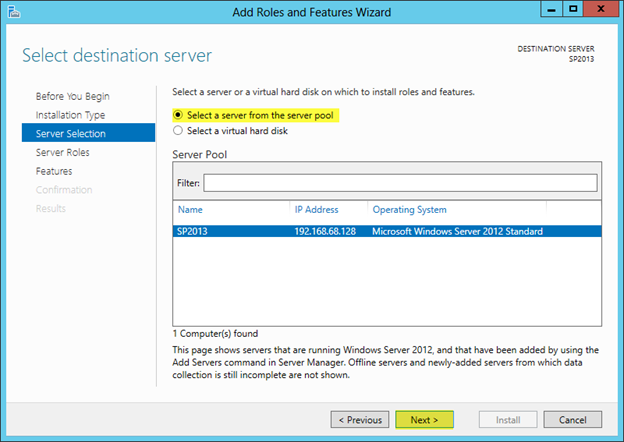
Destination server selected from the server pool.

“

On the Server Roles screen, check the dcheckbox next to Web Server (IIS)
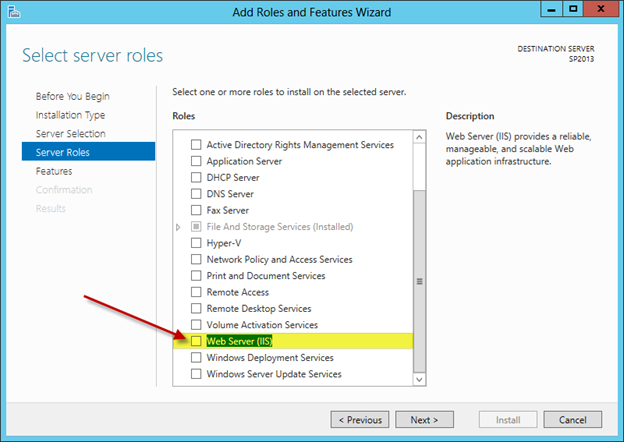
Web Server IIS selected in the server roles list.

“

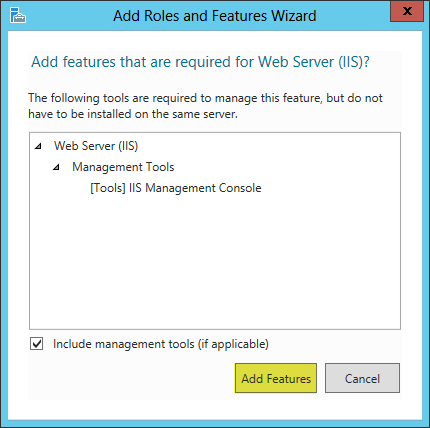
Press Add Features

Required IIS Management Console feature confirmation.

“

Web Server (IIS) should now be checked off, press Next
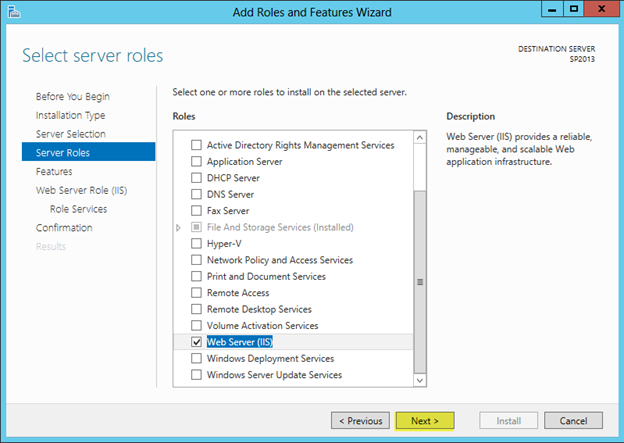
Web Server IIS role selected after adding its dependencies.

“

On the Features screen, add any additional features you want installed. In my case I added .NET Framework 3.5 Features

Press Next
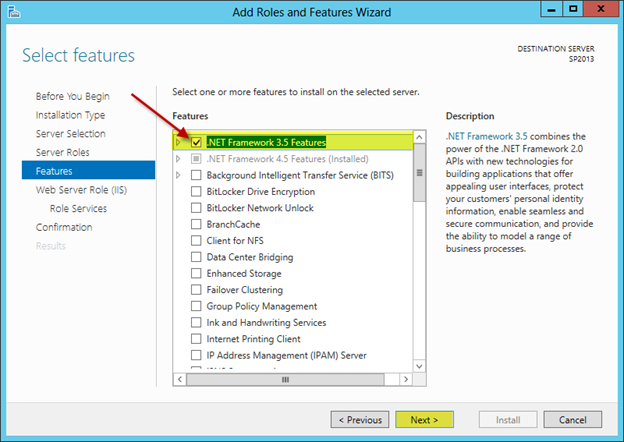
Additional Windows features selected for the web-server installation.

“

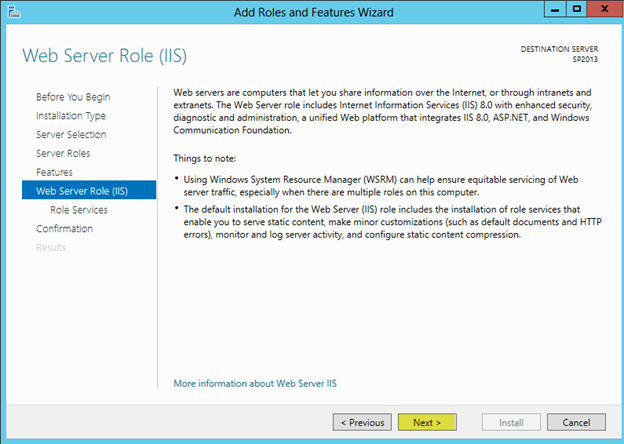
Press Next

Web Server IIS role introduction.

“

On the Role Services screen, add any IIS components you want installed. I almost always need to add the Windows Authentication role service

Press Next once you have made your selection(s)
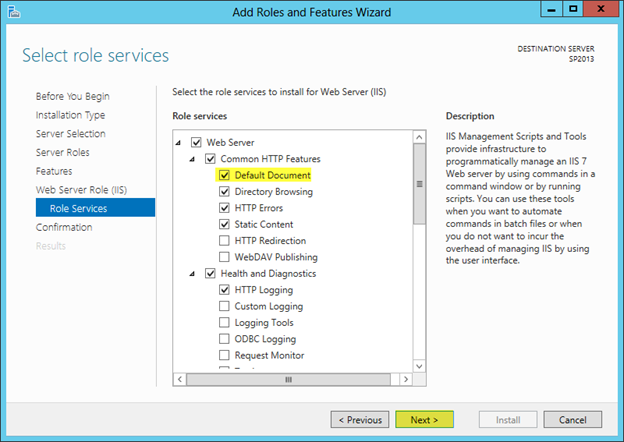
IIS role-service selection including authentication components.

“

Verify all of the components are correct and press Install
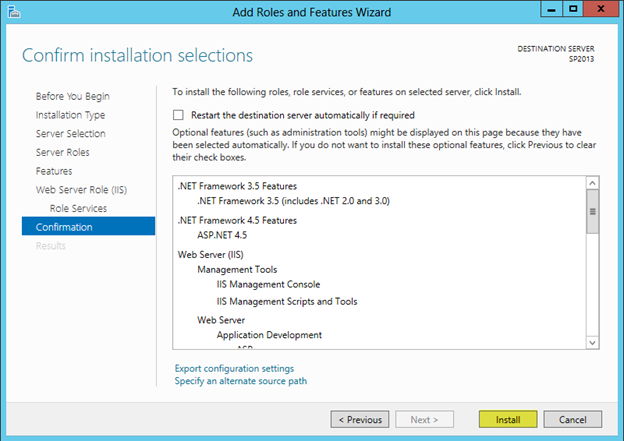
Confirmation of the selected IIS role and features.

“

You can close the wizard which will not affect the installation. If you keep it open you will be able to monitor the progress of the installation and press Close when it completes.
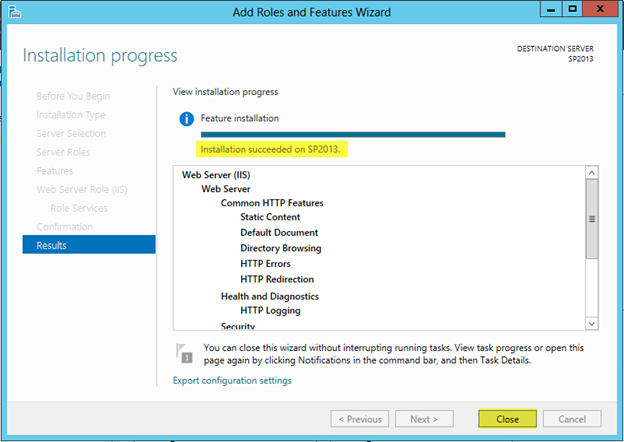
IIS role and features installed successfully.

“

After the installation is complete you will find the Internet Information Services (IIS) Manager under Administrative Tools
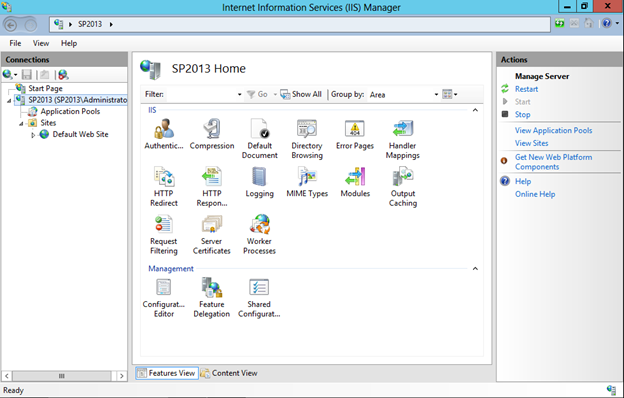
IIS Manager available after installing the web-server role.

“

Post Views: 2,574
<- How to disable IE Enhanced Security in Windows Server 2012
SQL Server 2012 Installation on Windows Server 2012 ->

Categories

  • Active Directory (5)
  • AI (5)
  • Amazon Cloud Services (1)
  • AWS (3)
  • Blazor (1)
  • C# (C-Sharp) (3)
  • CI/CD Pipelines (1)
  • Cloud (1)
  • Cloudflare (2)
  • Codex (2)
  • Containers (4)
  • Deployment (2)
  • Development (6)
  • DNS (1)
  • Docker (3)
  • Email (1)
  • Family (1)
  • General (5)
  • IIS 6.0 (4)
  • IIS 7.0 (10)
  • IIS 8.0 (1)
  • Infrastructure as Code (IaC) (1)
  • Kubernetes (3)
  • Linux (11)
  • Microsoft 365 (2)
  • MySQL (1)
  • Office 2010 (1)
  • PHP (1)
  • PowerShell (11)
  • Productivity (1)
  • Security (2)
  • Servers (9)
  • SharePoint 2007 (8)
  • SharePoint 2010 (19)
  • SharePoint 2013 (2)
  • SharePoint Online (1)
  • SMTP (4)
  • SQL Server 2008 (1)
  • SQL Server 2008 R2 (1)
  • SQL Server 2012 (2)
  • SQL Server 2019 (1)
  • SSL (1)
  • Travel (1)
  • Troubleshooting (1)
  • Ubuntu (9)
  • Uncategorized (1)
  • URL Rewrite (2)
  • Visual Studio 2019 (1)
  • Visual Studio Code (1)
  • Web Server (1)
  • Windows 10 (7)
  • Windows 2003 (9)
  • Windows 2008 (18)
  • Windows 2012 (6)
  • Windows 7 (3)
  • Windows Firewall (1)
  • Windows Server (1)
  • Windows Vista (1)
  • WordPress (5)
  • WP-CLI (3)

Recent Posts

  • Fix ‘Codex Could Not Start’ in VS Code Remote SSH on Linux
  • Move WordPress Uploads to Amazon S3 with the Uploads to S3 Plugin
  • WordPress Must-Use Plugins: MU Plugins vs. Regular Plugins
  • Install Codex Desktop on Windows Server and Control It from Your Phone
  • Create an Internal Certificate Authority for Private Websites

Advertisement

Tags

agents.md ai coding agents aws bash cloudflare cloud storage codex context engineering developer workflow dev to production dns externalize blob externalize sharepoint data full installation https IIS IIS installation index server configuration installing cumulative updates linux load balance central administration microsoft 365 nginx powerpoint powershell redirect http to https s3 server setup sharepoint 2010 cumulative updates sharepoint 2010 farm build sharepoint 2010 farm configuration sharepoint 2010 farm installation sharepoint data externalization ssl storagepoint tls ubuntu ubuntu server web server windows windows server 2008 wordpress WordPress plugins wp-cli x86
© 2026 JPPinto.com. All rights reserved.