Categories
Advertisement
Tags
Installing the Web Server Role (IIS) on Windows Server 2012 |
Sep
11
|
| « How to disable IE Enhanced Security in Windows Server 2012 | SQL Server 2012 Installation on Windows Server 2012 » |
“
Launch Server Manager

“
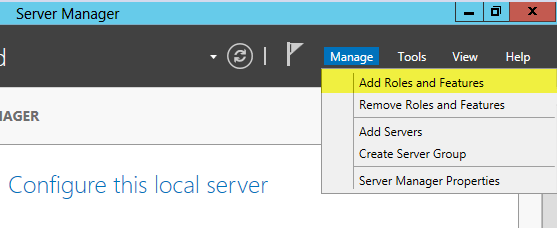
Click on Manage then select Add Roles and Features
“
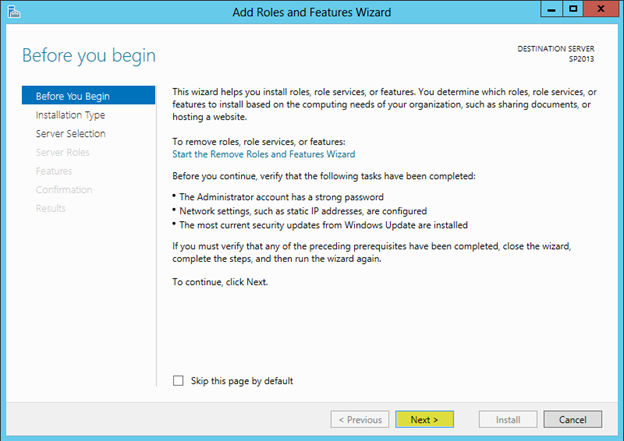
Click Next on the Before you Begin screen
“
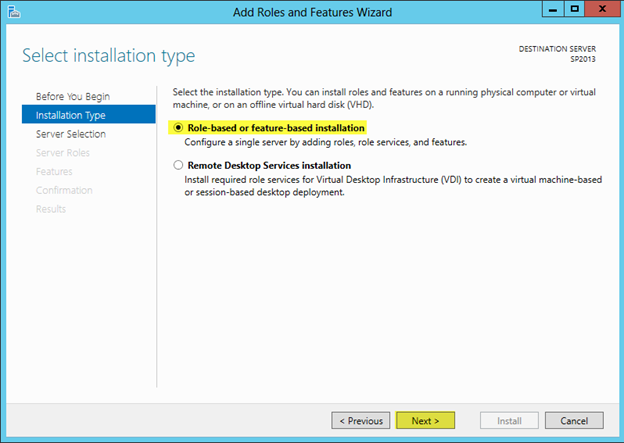
On the Installation Type screen select Role-based or feature-based installation then press Next
“
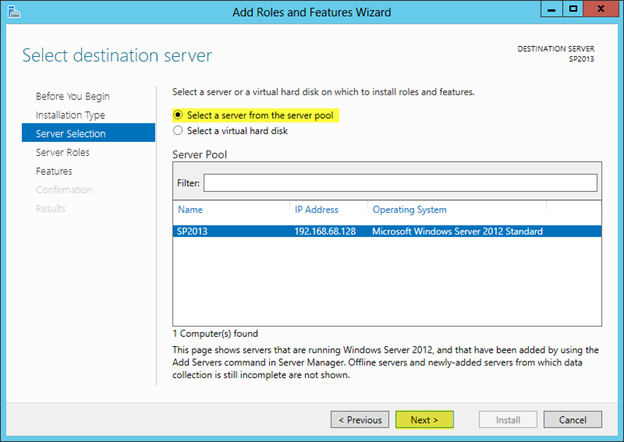
On the Server Selection screen select the server in this case we are installing on the local server which is SP2013, press Next
“
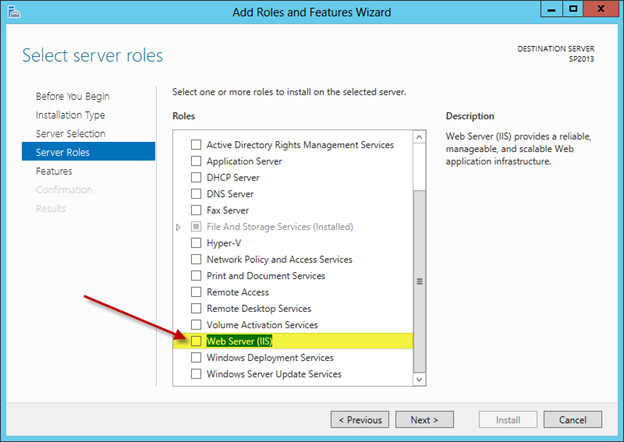
On the Server Roles screen, check the dcheckbox next to Web Server (IIS)
“
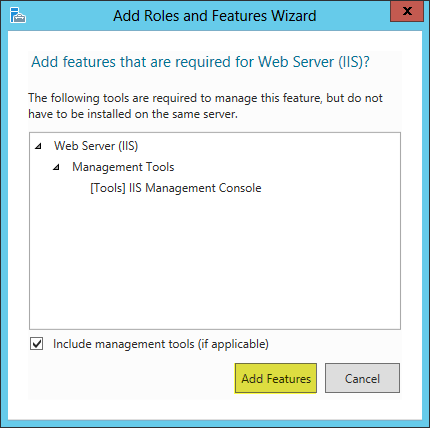
Press Add Features
“
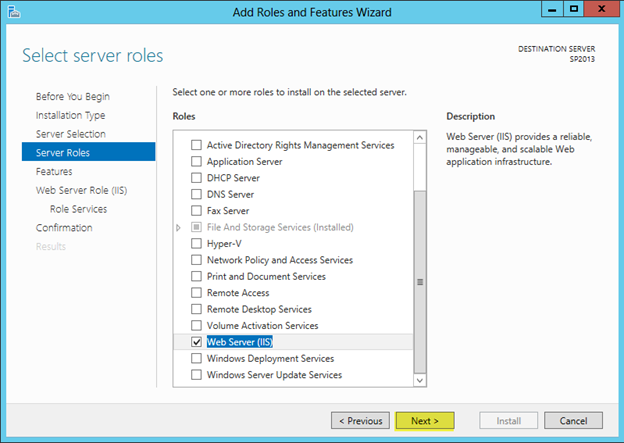
Web Server (IIS) should now be checked off, press Next
“
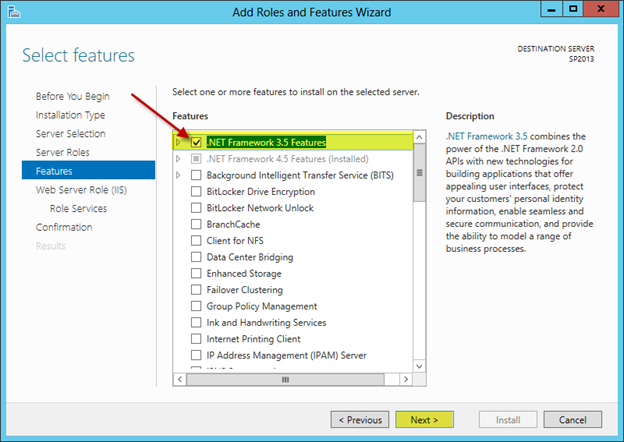
On the Features screen, add any additional features you want installed. In my case I added .NET Framework 3.5 Features
Press Next
“
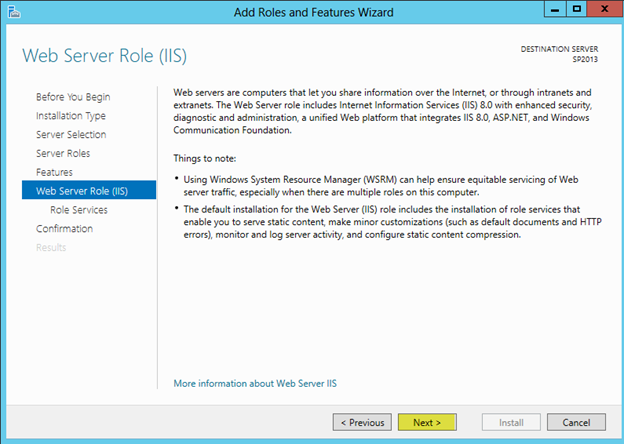
Press Next
“
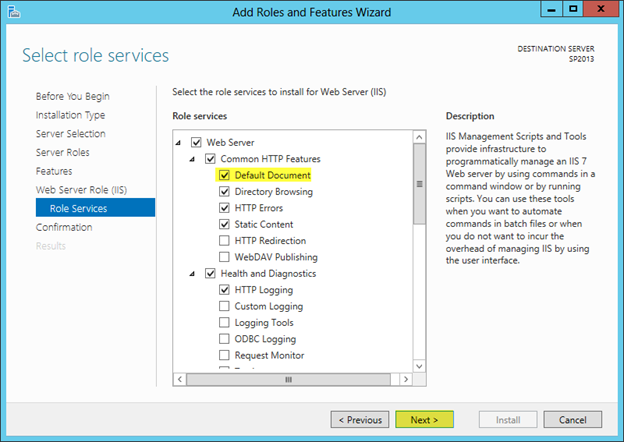
On the Role Services screen, add any IIS components you want installed. I almost always need to add the Windows Authentication role service
Press Next once you have made your selection(s)
“
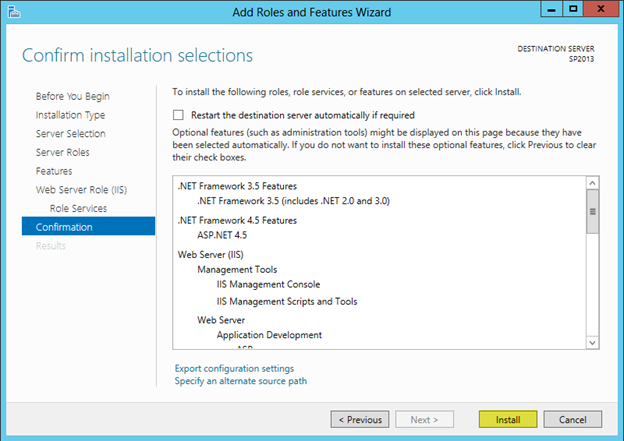
Verify all of the components are correct and press Install
“
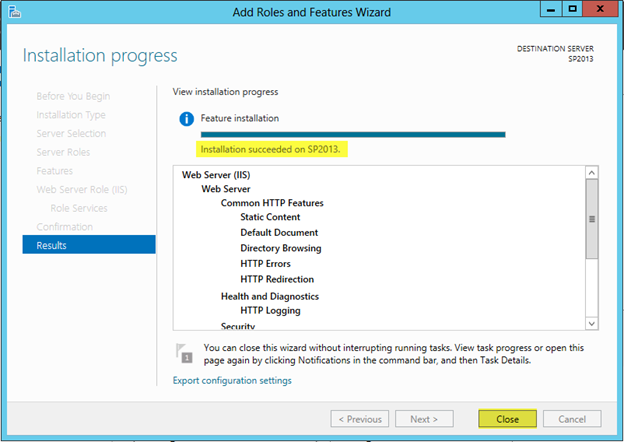
You can close the wizard which will not affect the installation. If you keep it open you will be able to monitor the progress of the installation and press Close when it completes.
“
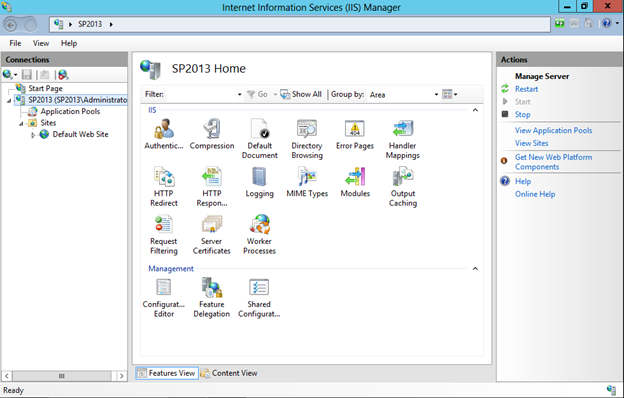
After the installation is complete you will find the Internet Information Services (IIS) Manager under Administrative Tools
“


